Handling the VMware vSphere 5.5 Active Directory integration error
Notice: This article is more than 10 years old. It might be outdated.
While attempting to integrate the VMware vSphere 5.5 vCenter Server Appliance (vCSA) with Microsoft Active Directory you might have stumbled over the error message “Error: Idm client exception: Failed to establish server connection”. This article will show you how to work around this issue and still use Active Directory with your vCSA.
Reproduce the error
The following steps show you how to reproduce the error. In a subsequent step you will then see how to prevent it.
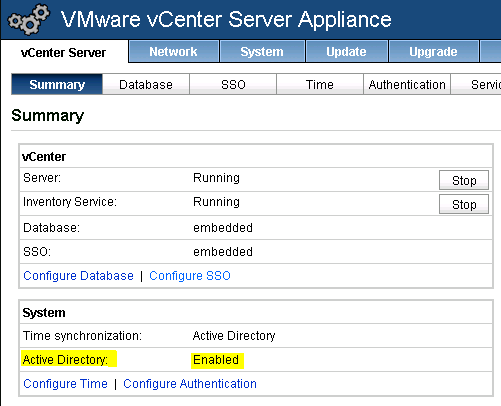
We start with the VMware vCenter Server Appliance (vCSA) joined to the Active Directory (See Figure 1).
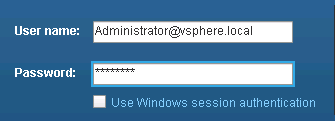
Login with the vCSA SSO credentials Administrator@vsphere.local. It has a default password of vmware (See Figure 2). Note that this account is different from the user root.
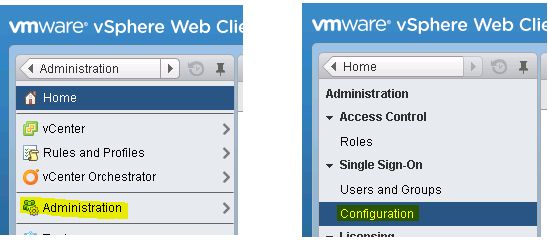
Navigate to Home -> Administration -> Single Sign-On -> Configuration (See Figure 3).
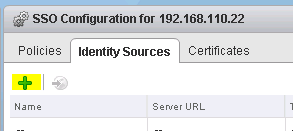
Next, try to create a new Identity Source (See Figure 4).
As the vCSA is already joined to the Active Directory domain the expectation would be to use the Integrated Windows Authentication for Active Directory along with using the vCSA machine account. In the end, that’s why we added vCSA to the Active Directory in the first place. Unfortunately we will soon see that we are let down with this expectation.
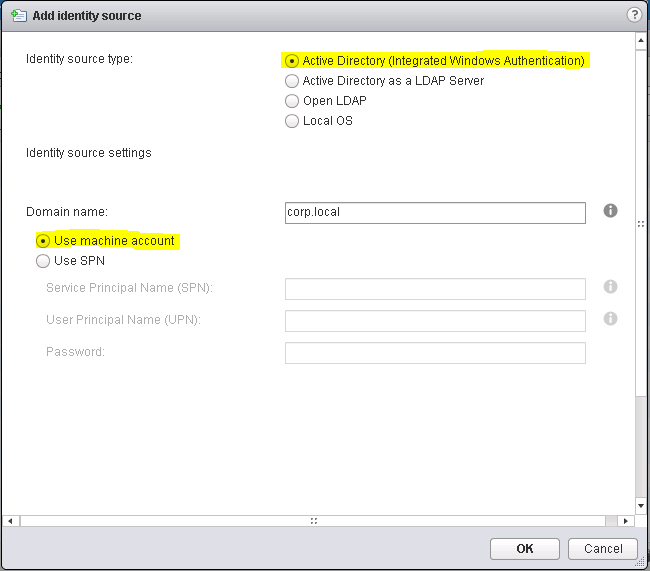
For now select as the Identity source type the value Active Directory (Integrated Windows Authentication), confirm your domain name and select Use machine account (See Figure 5).
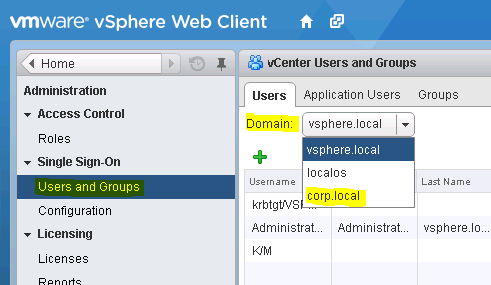
After closing the previous dialog with OK, you should see the new identity source (See Figure 6).

Next, navigate to Administration -> Configuration -> Single Sign-On -> Users and Groups -> Users and pick under Domain the domain you just created (See Figure 7).
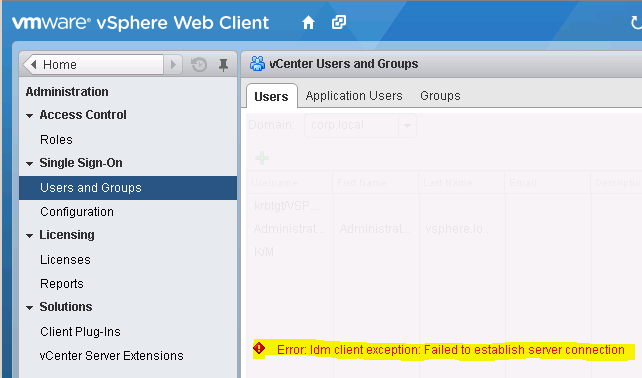
Instead of displaying the users from Active Directory as expected, vCSA shows the error message “Error: Idm client exception: Failed to establish server connection”. Thus it appears as if the default Active Directory integration in vCSA is broken (See Figure 8).
The Workaround
Now that we have seen the issue, let’s work around it. This way we can still achieve the goal of using Active Directory as an identity source for SSO in VMware vSphere.
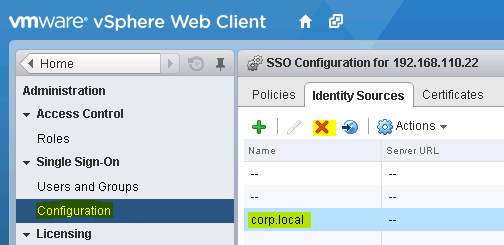
Start by removing the Active Directory identity source that you previously created (See Figure 9).
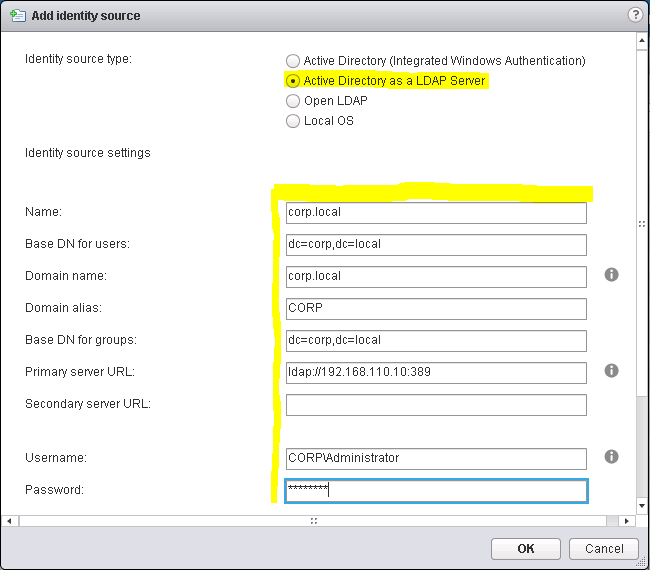
Create a new identity source. This time select for the Identity source type the value Active Directory as a LDAP server. Fill out the remaining fields as follows (See Figure 10):
- Name: Your AD domain name; E.g. “corp.local”
- Base DN for users: Split your domain name in pieces along the dots (“.”) and prefix each part with a “dc=”. Place commas “,” in between each part; E.g. “dc=corp,dc=local”
- Domain name: Your AD domain name; E.g. “corp.local”
- Domain alias: Your netbios name of the AD domain; E.g. “CORP”
- Base DN for groups: Same a the Base DN for users; E.g. “dc=corp,dc=local”
- Primary Server URL: The Active Directory server as a URL with the protocol “ldap://” and the port 389.; E.g. ldap://192.168.110.10:389
- Secondary Sever URL: Another Active Directory server as a URL if you have one. Otherwise leave it blank; E.g. ldap://192.168.110.20:389
- Username: An Active Directory username in netbios notation with privileges to read all users and groups; E.g. “CORPAdministrator”
- Password: The password of the above user.
Test your settings by clicking on the Test Connection button. This will attempt to connect to the Active Directory as a LDAP server with the provided settings (See Figure 11).
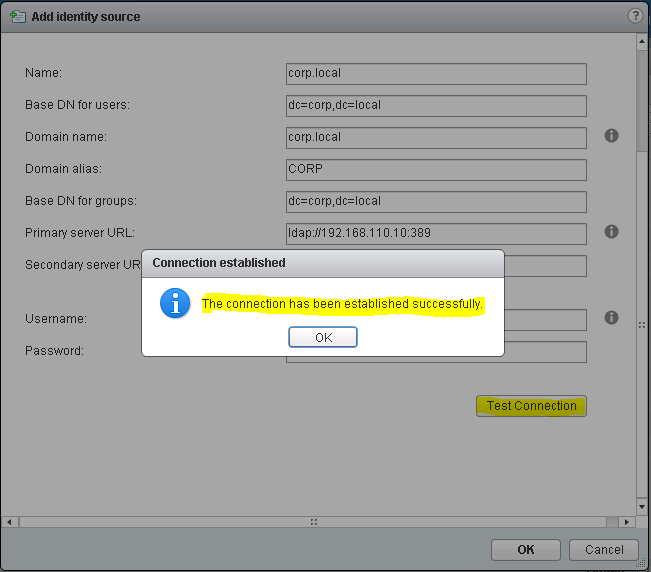
If the connection test was successful, save the settings. You will notice the new identity source, you just added (See Figure 12).

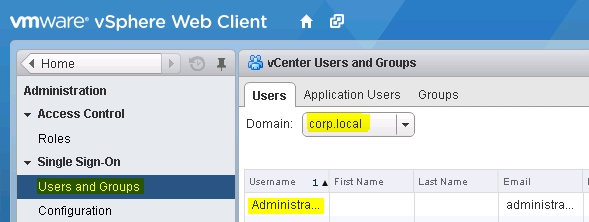
Now, if you return to Administration -> Configuration -> Single Sign-On -> Users and Groups -> Users and pick under Domain the domain you just created, you will see users and groups from this Active Directory (See Figure 13). With this we have achieved our goal.
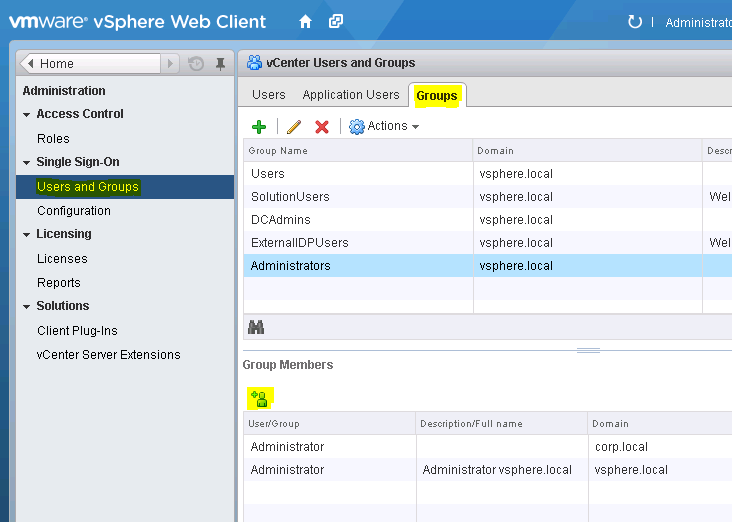
Don’t forget to add users from your Active Directory to corresponding vCSA groups to grant access to these users (See Figure 14).
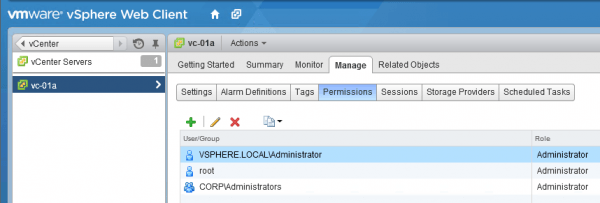
Also don’t forget to add users from your Active Directory to the vCenter Permissions (See Figure 15).
Windows Session Authentication
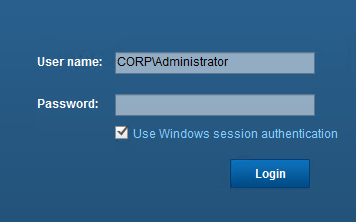
The Windows Session Authentication for the vSphere Web Client (See Figure 16) will still work with this workaround. The reason is that vCSA uses Kerberos to authenticate the Windows Client against the vSphere Web Client (via an installable plugin). Once that authentication is successful it solely checks in the identity source matching the domain name if that user exists. No Password is ever transferred from the Windows Client to the vCSA or the identity source.
Final remarks
One would hope that after joining vCSA to the Active Directory domain, it is possible use the Integrated Windows Authentication for Active Directory along with using the vCSA machine account. While we are being let down on this expectation, the above workaround will at least allow you to use an Active Directory as an identity source for SSO in VMware vSphere.
Keep in mind that for adding Active Directory as an identity source via LDAP it is not necessary to join the vCSA to Active Directory. But you might have other independent reasons to do so.
